
Introduction
Installing carpet tiles in your home can be done quickly and easily, and is a great way to save some extra dollars from your renovating budget. Unlike traditional rolls of carpet, carpet tiles do not need any specialised tools or skills, and most rooms can be done easily in a day. So read on and we will show you just how easy installing carpet tiles can be.
You will also find at the bottom of the page a link to a downloadable pdf document.
To install carpet tiles you will need a good marker, a utility knife ( that takes strong blades ) a scraper and straight edge or metal ruler. You will also need glue, or double sided tape or dots to stick your tiles down.
Step 1
The first step is to tear out the existing carpet. Starting at a wall or corner get the edge and lift the carpet clear of the nail strip under it. Lift it all the way around the edge, then roll it up and get it out of the room. Normal rolls of carpet usually have underlay or some other padding underneath the roll. Remove this too and why you are there also use a screwdriver or crowbar and remove the nail strips from around the edge of the room as well.

Vacuum and mop the floor to get rid of dust and other loose bits. And nail in any nails that are sticking out. Scrape any old glue, and fill any holes. With carpet tiles it is important the floor underneath is level and clean otherwise you will see the problems through the carpet tiles.
step 2
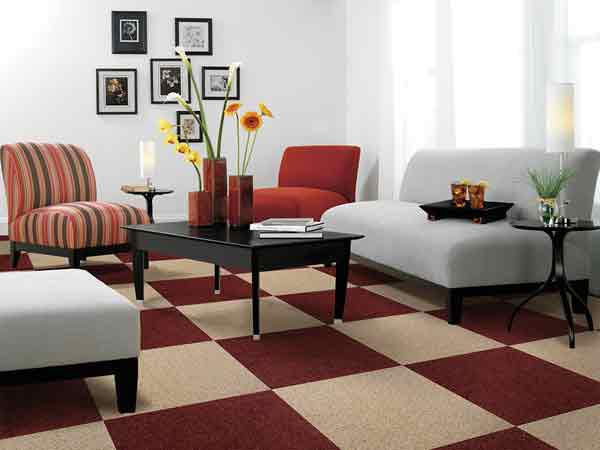
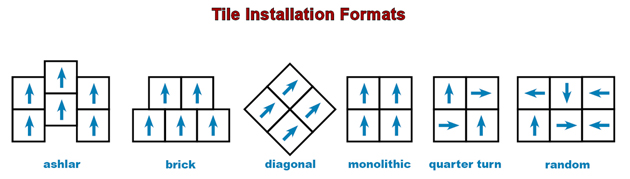
Plan out how you are going to lay your tiles. Usually this is side by side, but sometimes you can get different effects by laying them different ways. Try different colour combinations to make patterns, or laying them offset to achieve different looks.
Pick where you are going to start laying from. This is usually starting from a corner or doorway to match another room, or starting from the middle of the room.
Step 3
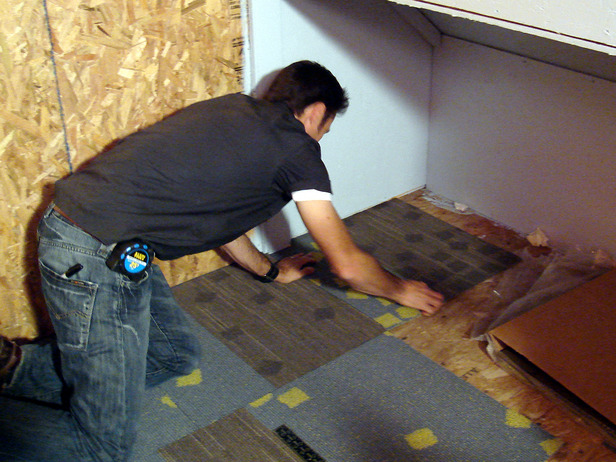
Lay out a section of glue or tape to the manufacturer’s instructions. Lay your first tile and make sure it is square to the wall or surrounding doorway. Using that first tile as your guide, lay the next tile making sure it is tight up against the first, and along the wall, door or line that you are using to keep square. It is important you lay all your tiles in the same direction ( using the marks on the back) or vary the direction by a pattern. Continue laying tiles in sections, then spread glue or tape to do the next section. Keep going until you have all the full tiles laid down.
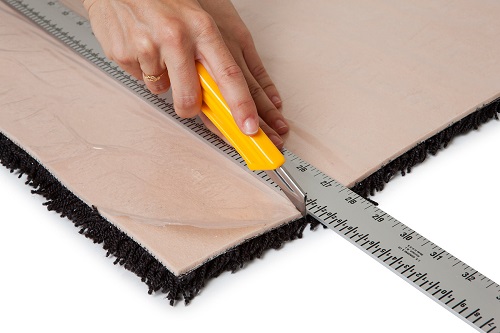
When all that is left is the gaps, get your straight edge and trim down full tiles to fill the spaces. Try using offcuts and tiles already cut so you don’t waste anything. Just make sure you match the pattern or direction of the tiles or it will look funny. Cut your tiles using your pen, knife and straight edge and taking time to cut them straight. Infill the edges, around obstacles, and everywhere else until you are done.
And Finally
A quick clean up: Remove all left over materials, Vacuum and clean the room and there you have it!
All thats left now is to enjoy your beautiful new floor covering.